Vector Drawable
Supporting multiple resolutions are sometimes a nightmare for the Android developer, especially with images, the only solution we have so far is either we use 9 -Patch images which is costly and Including multiple images for different resolutions also increases the project size.
VectorDrawable, AnimatedVectorDrawable and some associated classes which provide some extremely powerful new options for adding complex vector graphics as paths (which will scale across form factors, screen sizes, and densities much better than bitmaps), and provide some equally powerful tools to animate them.
Basic Introduction
Vector drawable's are based on vector graphics, vector graphics are a way of describing graphical elements using geometric shapes. Android Studio includes a tool called Vector Asset Studio that helps you add material icons and import Scalable Vector Graphic (SVG) and Adobe Photoshop Document (PSD) files into your project as vector drawable resources. Vector Asset Studio adds a vector graphic to the project as an XML file that describes the image. Maintaining one XML file can be easier than updating multiple raster graphics at various resolutions.
Importing a Vector Graphic
Vector Asset Studio helps you to import a vector graphics file into your app project. Follow one of the following procedures:
-
Adding material Icon
-
Or convert an SVG or PSD file into a vector graphic.
Getting Started
1. In the project Right click on the drawable directory.
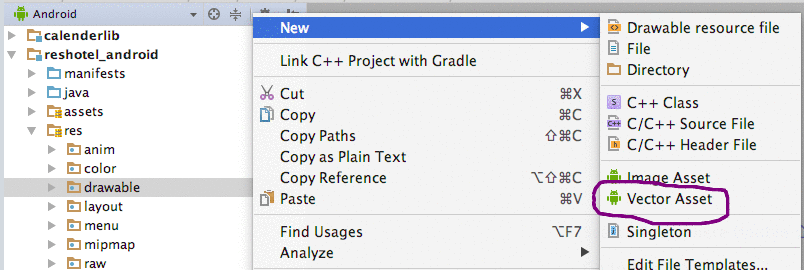
2. There are 2 options with a radio button to add a material icon or add image file from a local file.
-
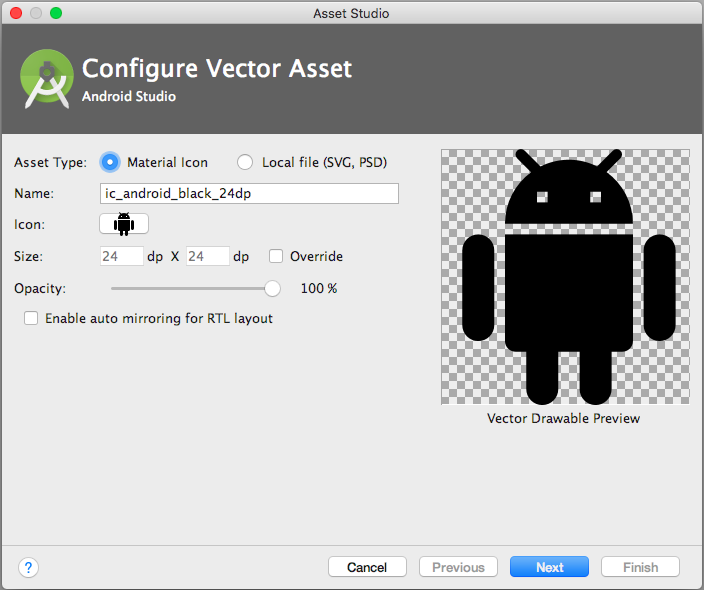
For adding a material icon, click on Icon and get most commonly used icons like a drawer, call, back, forward etc.
-
For adding your customize SVG and PSD file, need to select local file option and add an image from your system, after adding image will be converted into XML graphics.
-
Finally, for both methods, give a file name and need click next and give the path where u want to save it, and click finish.
Using VectorDrawable
-
Add app:srcCompat to your Image view so that the support library can do the rest to display the image seamlessly on all versions of Android.
-
For using it as background (in XML also) you need to intimate AppCompat Delegate to enable compact vector from a resource. Below is the code for that.

-
Whenever you are going to use VectorDrawable from Java or to use it as background (in XML also) remember to use AppCompat View instead of normal view, here I have used AppCompat ImageView, please also refer to the layout we created before.
Gradle Settings
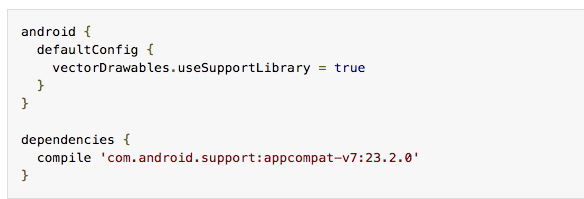
Before using Vector Asset Studio, you must add a statement to your build.gradle file:
Advantage of vector drawable
-
The major advantage of using a vector drawable is image scalability, Unlike popular image formats like Bitmap, JPEG, GIF, and PNG, Vectors do not lose quality as they are scaled up or down.
-
Easy to import and default icons that are used in almost every application available in material icons can be used and customized very easily, makes it time-saving method.
-
Using vector drawable instead of bitmaps reduces the size of your APK because the same file can be resized for different screen densities without loss of image quality, makes it memory efficient.
Key Features
-
Can change color as per requirement changes by changing just color hashcode in, don’t need to depend on a designer to create a new image.
-
By different feature like rotation, x & y position and alpha etc. can set image visibility.
-
Can be used as normal images in custom drawable.
-
By the help of AnimatedVectorDrawable, an image can be animated also.
Sample Vector drawable
-
Vector drawable from a material icon.
![]()


-
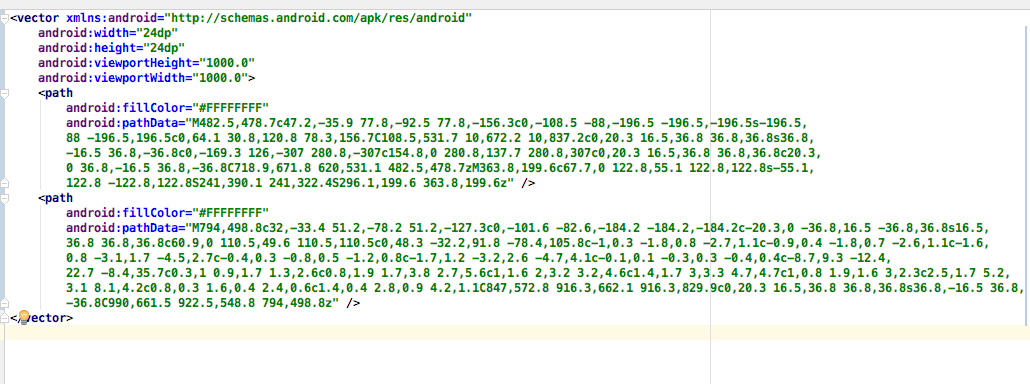
Vector drawable from SVG icon

I hope this article gave you an overview about Vector Drawables in Android. Feel free to ask any queries/doubts in the comments section below.

Comments
Zara
thanks for sharing.